Microsoft vừa cho ra đời 1 CMS mã nguồn mở tên là OrChard, OrChard ra đời giúp ta build 1 CMS content driven webiste, thông tin thêm về OrChard các bạn có thể tìm hiểu ở đây orchard project. Trong bài này mình sẽ hướng dẫn các bạn làm thế nào để install Orchard trên localhost sử dụng csdl SQL.
Chúng ta có 2 cách để install Orchard: install qua WPI và manual install. Mình sẽ chọn cách install manual, đầu tiên cần tải Orchard về từ http://orchard.codeplex.com/releases/view/50197, version Orchard.Source.1.0.20.zip, sau khi tải xong tiến hành giải nén và dùng visual studio 2010 open Orchard.sln trong thư mục Orchard.Source.1.0.20\src.
Press F6 để build Solution, sau đó nhấn F5 để start Orchard.Web.
Màng hình welcome xuất hiện yêu cầu điền thông tin về admin account, kiểu store db.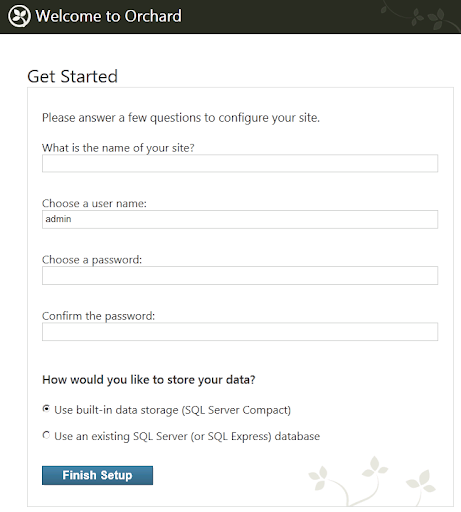
Mình sẽ chọn Option Use an existing sql server (or sql express) database. (Mình đã tạo db tên là orcharddb và user login trước đó)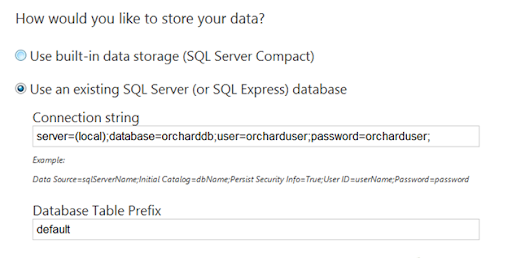
Nếu thành công chúng ta sẽ thấy màng hình welcome như: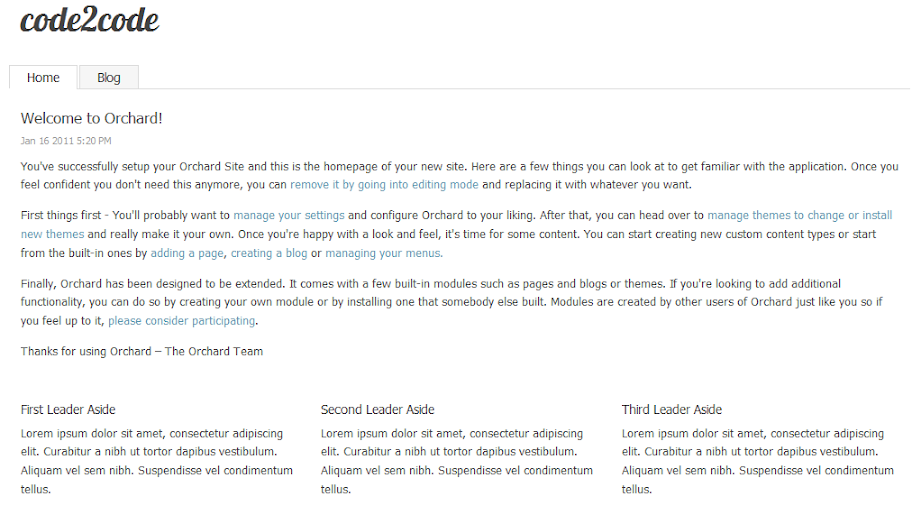
Login vào Admin Section: http://localhost:30320/OrchardLocal/Admin
Ở phần này chúng ta có thể tạo pages, Blog, Widgets .....
Click vào Create a new Blog để tạo 1 blog mới.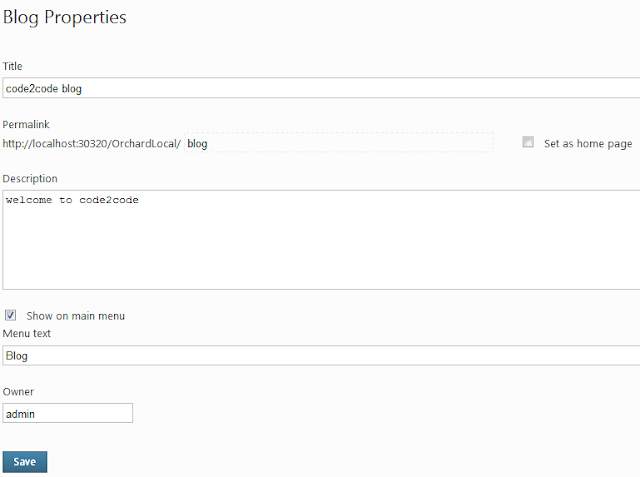
Chú ý: Chúng ta có thể set blog của chúng ta là trang default, bằng cách check vào Set as Home Page.
Nhấn vào Create New Post để tạo 1 bài viết mới cho Blog.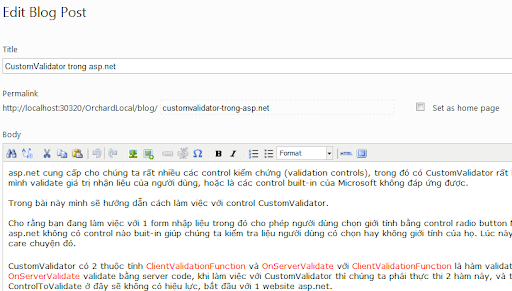
Trở về màng hình chính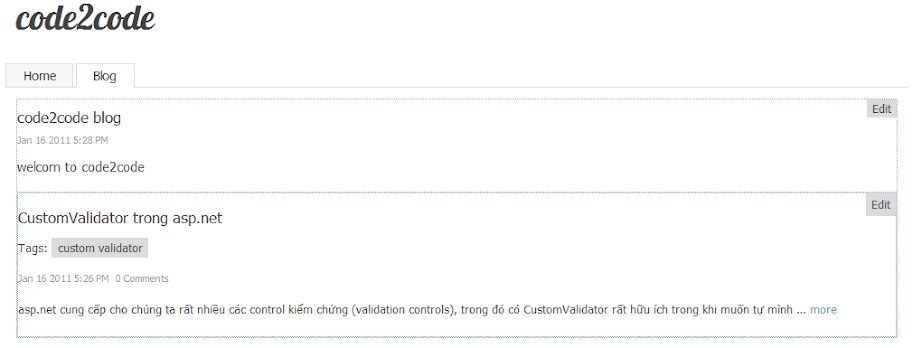
Ở phần Admin chúng ta còn rất rất nhiều những đặc trưng hấp dẫn: Media, Widget, Pages, Users.... Các bạn từ từ khám phá nhé.
Happy Orcharding!
Chủ Nhật, 16 tháng 1, 2011
install orchard trên localhost
Thứ Ba, 4 tháng 1, 2011
cài đặt blogengine 2.0 sử dụng vs2010 với csdl mysql
Cách đây vài ngày blogengine team đã cho ra đời phiên bản chính thức blogengine 2.0 sau bao tháng chờ đợi, với version 2.0 này thì blogengine làm việc với môi trường .net 3.5 sử dụng visual studio 2008, thế nhưng blogengine có thể work với môi trường .net 4.0 với visual studio 2010.
Trong bài blog này mình sẽ hướng dẫn chúng ta cách làm cho blogengine work với .net 4.0 sử dụng visual studio 2010, cài đặt sử dụng csdl My sql.
Các bước chuẫn bị:
1. PHP Admin (WampServer).
2. Visual Studio 2010.
3. BlogEngine 2.0 source version.
4. mysql-connector-net-6.3.6
Đầu tiên chúng ta tải BlogEngine 2.0 về từ http://blogengine.codeplex.com/releases/view/58418
Sau khi tải xong, tiến hành giải nén và open BlogEngine.sln trong thư mục BlogEngine.
Chọn project BlogEngine.Core → Properties (Alt + Enter) → Target Framework 4.0 → Yes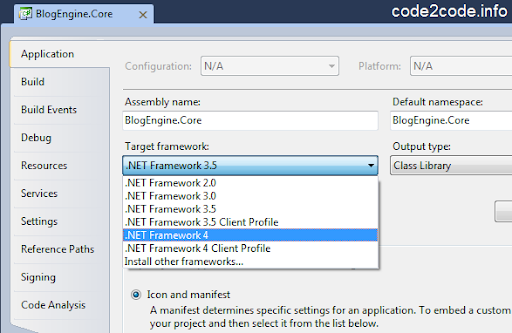
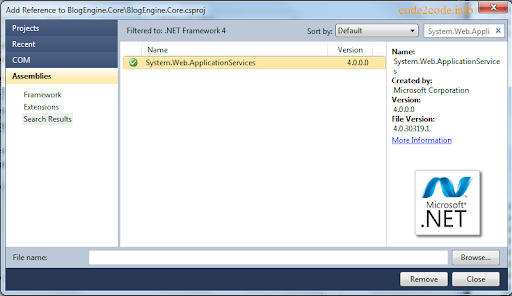
Tiếp tục add assembly System.Web.ApplicationServices lý do vì 1 số thay đổi đối với role and membership trong .net 4.0, từ BlogEngine.Core chọn Add Reference → System.Web.ApplicationService tiến hành Build (F6) phải đảm bảo là không có 1 message error nào.
Change target framework cho blogengine.net website: từ BlogEngine.Net chọn Properties Page → Build Tab → Target Framework 4.0 → Build website (f6)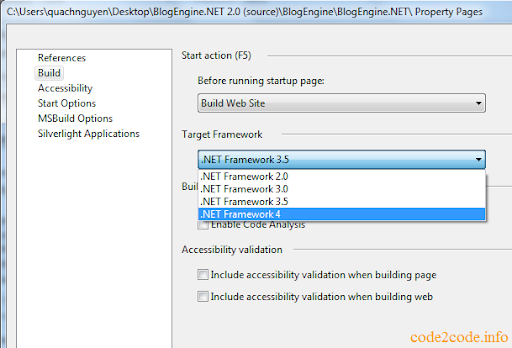
Giờ Press F5 để chạy BlogEngine lên, bởi mặc định BE sẽ sử dụng data store là xml nằm trong App_Data, nến nếu muốn change việc lưu dữ liệu sang dạng khác, mysql chẳng thì chúng ta tìm đến thư mục Setup chọn MySQL.
Trước hết phải tạo 1 db trong mysql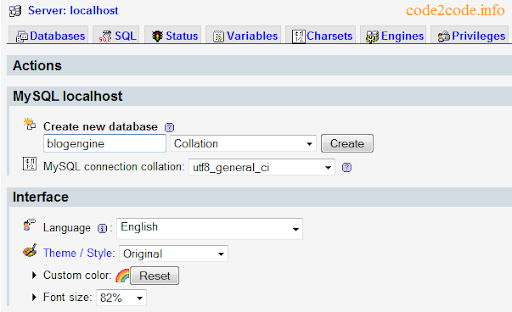
Sau đó chuyển qua tab Import → Browse tới tập tin MySQLSetup2.0.0.sql trong thư mục setup/MySQL → Go, chắc chắn Import has been successfully finished, 213 queries executed. được trả về.
Config db connection:
Copy toàn bộ nội dung trong file setup/MySQL/MySQL.NET_4.0_Web.Config và paste vào web.config.
Chỉnh connection:
<connectionStrings>
  <clear/>
  <add name='BlogEngine' connectionString='Server=localhost;Database=blogengine;Uid=root;Pwd=;' providerName='MySql.Data.MySqlClient'/>
</connectionStrings>
Do chúng ta sử dụng Mysql làm data source nên cần 1 thư viện Mysql Connector (mysql-connector-net-6.3.6) version mới nhất tải ở đây, sau khi tải và cài đặt xong mysql connector, chúng ta copy C:\Program Files\MySQL\MySQL Connector Net 6.3.6\Assemblies\v4.0\MySql.Data.dll vào thư mục Bin của website.
Note: do chúng ta dùng version (v6.3.6) mới nhất của Mysql Connector nên trong file web.config cần sửa lại thành:
  <system.data>
    <DbProviderFactories>
      <clear />
      <add name='MySQL Data Provider' invariant='MySql.Data.MySqlClient'
           description='.Net Framework Data Provider for MySQL'
           type='MySql.Data.MySqlClient.MySqlClientFactory, MySql.Data,
               Version=6.3.6.0, Culture=neutral, PublicKeyToken=c5687fc88969c44d' />
    </DbProviderFactories>
  </system.data>
Press F5 để start BlogEngine chúng ta sẽ thấy màng hình sau:
Nếu thế coi như chúng ta đã setup thành công BlogEngine làm việc với môi trường .net 4.0 sử dụng csdl Mysql
Happy Bloging
blogengine.net 2.0 is released
We're very pleased to announce the release of BlogEngine.NET 2.0. It can be downloaded here.
We accomplished meeting most of our Roadmap goals. The most visible change is the redesign of the control panel. Many thanks to team member Janko Jovanovic for this much more modern control panel UI. There's now a Dashboard, and new pages to View all of your Posts and Pages, which is really nice for easily being able to see your data.
New Databases
On the database side, we are now supporting SQL CE 4. This is a standalone database similar to SQLite and VistaDB. We're no longer providing updates for VistaDB, but you may update your existing VistaDB with the new DB tables & columns which can be found in the upgrade scripts for other databases we continue to provide updates for (SQL Server, MySQL, SQLite).
Features & Upgrading
A complete list of new features in BlogEngine v2.0 can be found here. It's worth noting that this version has made the leap from .NET 2.0 to .NET 3.5. If you are upgrading from a previous version, there's been a lot of changes to files and folders. Please see the upgrade instructions which provide a relatively painless way to upgrade. There are also a small number of breaking changes when upgrading that may affect you. The FAQs and Breaking Changes can be found at the bottom of the Upgrade Instructions page. If you run into any problems upgrading to v2.0, first check the FAQs and Breaking Changes, then search past Discussions to see if your issue has been discussed. If you're still stuck, you are welcome to post a question on the Discussion board.
Upgrading from the BlogEngine.NET 2.0 Release Candidate
If you were testing the BlogEngine.NET 2.0 RC (Release Candidate) and will be upgrading to this final release of BlogEngine.NET 2.0, because there have been changes to a large number of files, including the web.config file, it is best to follow the same set of Upgrade Instructions when upgrading to the final release of BlogEngine.NET 2.0.
Installing from the Web Application Gallery
BlogEngine.NET 2.0 will be available to download from the web application gallery / web platform installer within the next couple of weeks. In the meantime, you may of course download BlogEngine.NET 2.0 directly from CodePlex.
More: http://www.dotnetblogengine.net/post/BlogEngineNET-20-is-Released.aspx