Thứ Bảy, 23 tháng 7, 2011

Apply Highlighting Keywords Found In Search Results in BlogEngine

Apply Highlighting Keywords Found In Search Results in BlogEngine: "

After reading the blog post: “Highlighting Keywords Found In Search Results”. I realize that I should apply this utility for my existing code2code.info blog, you also do it for you by following my below instruction:

Prerequisite:
- BlogEngine (BE) source code version 2.5
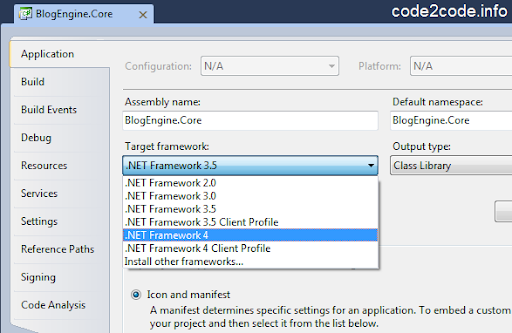
- Visual Studio 2010

Note:Because I’ve been using BlogEngine v2.5 with .net 4.0 so I have to use Visual Studio 2010 to customize my existing blog. But you also can do it with using Visual Studio 2008 if you are using older version of BE

Step 1: Open Util.cs in BlogEngine.Core and paste the code below (end of line to easy to tracking or maintain)

///<summary>
/// Wraps matched strings in HTML span elements styled with a background-color
///</summary>
///<param name="text"></param>
///<param name="keywords">Comma-separated list of strings to be highlighted</param>
///<param name="cssClass">The Css color to apply</param>
///<param name="fullMatch">false for returning all matches, true for whole word matches only</param>
///<returns>string</returns>
public static string HighlightKeyWords(this string text, string keywords, string cssClass, bool fullMatch)
{
if (text == String.Empty || keywords == String.Empty || cssClass == String.Empty)
return text;
var words = keywords.Split(new[] { ',' }, StringSplitOptions.RemoveEmptyEntries);
if (!fullMatch)
return words.Select(word => word.Trim()).Aggregate(text,
(current, pattern) =>
Regex.Replace(current,
pattern,
string.Format("<span style=\"background-color:{0}\">{1}</span>",
cssClass,
'$0'),
RegexOptions.IgnoreCase));
return words.Select(word => '\\b' + word.Trim() + '\\b')
.Aggregate(text, (current, pattern) =>
Regex.Replace(current,
pattern,
string.Format("<span style=\"background-color:{0}\">{1}</span>",
cssClass,
'$0'),
RegexOptions.IgnoreCase));
}


Press F5 to Build BlogEngine.Core project.

Step 2: Open search.aspx and add the code like below:

<asp:repeater runat='server' id="rep">
<ItemTemplate>
<div class="searchresult">
<a href='<%# Eval('RelativeLink') %>"><%# Eval('Title').ToString().HighlightKeyWords(Request.QueryString['q'], 'yellow', true)%></a>
<span class="text"><%# GetContent((string)Eval('Description'), (string)Eval('Content')).HighlightKeyWords(Request.QueryString['q'], 'yellow', true)%></span>
<span class='type' runat='server' id='type' />
<span class="url"><%# ShortenUrl((String)Eval('RelativeLink')) %></span>
</div>
</ItemTemplate>
</asp:repeater>


Note: The 2nd parameter is style sheet class name, you have to define it by your refer color.

Step 3: Testing and deployment.
I have apply the highlight for title and content if it matches. Then you will see the result output like screenshot below:


Happy BE-ing...

"

Chủ Nhật, 3 tháng 7, 2011

Sử dụng control Ext.Net GridPanel và phân trang với Entity Framework

Sử dụng control Ext.Net GridPanel và phân trang với Entity Framework: "

Gần đây Ext.Net vừa chính thức cho ra đời version 1.0 cho cả Community và Pro, với nhiều tính năng và các fix bugs đã được cải thiện, cũng giống như tất cả các bộ thư viện control khác. Và cũng giống như ASP.NET GridView control, Ext.Net cũng cung cấp control dữ liệu (tabular) được đặt tên là GridPanel.

Trong bài viết này mình sẽ hướng dẫn bà con, các sử dụng Ext.Net GridPanel để binding data từ CSDL sử dụng Entity Framework và phân trang.

Yêu cầu trước tiên:
Download và cài đặt:
- Download version mới nhất của Ext.NET tại: http://www.ext.net/download
- Hướng dẫn cài đặt: lập trình ext.net với visual studio 2010

Tạo 1 website ASP.NET C# (VB.NET tùy ý) và kéo control GridPanel vào sau đó set các thuộc tính như:
Height='400'
Title='Customer List'
AutoExpandColumn='Address'

Định nghĩa Store (data source) cho GridPanel, ở đây mình sẽ kết nối với CSDL Northwind và lấy danh sách Customers lên:

<%@ Page Language='C#' AutoEventWireup='true' CodeFile='Default.aspx.cs' Inherits='_Default' %>


<%@ Register Assembly='Ext.Net' Namespace='Ext.Net' TagPrefix='ext' %>


<!DOCTYPE html PUBLIC '-//W3C//DTD XHTML 1.0 Transitional//EN' "http://www.w3.org/TR/xhtml1/DTD/xhtml1-transitional.dtd">


<html xmlns="http://www.w3.org/1999/xhtml">


<head runat="server">


<title>Using Ext.Net GridPanel with Paging in Entity Framework</title>


</head>


<body>


<form id='form1' runat="server">


<div>


<ext:ResourceManager ID='ResourceManager1' runat='server' />


<ext:GridPanel ID='GridPanel1' runat='server' Height='400' Title='Customer List'


AutoExpandColumn="Address">


<Store>


<ext:Store ID='dsCustomers' runat='server' OnRefreshData='Store1_Refresh' RemoteSort="true">


<Proxy>


<ext:PageProxy />


</Proxy>


<Reader>


<ext:JsonReader IDProperty="CustomerID">


<Fields>


<ext:RecordField Name='CustomerID' SortDir='ASC' />


<ext:RecordField Name='CompanyName' />


<ext:RecordField Name='ContactName' />


<ext:RecordField Name='Address' />


<ext:RecordField Name='City' />


<ext:RecordField Name='Phone' />


<ext:RecordField Name='Fax' />


<ext:RecordField Name='Region' />


</Fields>


</ext:JsonReader>


</Reader>


<BaseParams>


<ext:Parameter Name='start' Value='0' Mode='Raw' />


<ext:Parameter Name='limit' Value='15' Mode='Raw' />


<ext:Parameter Name='dir' Value='ASC' />


<ext:Parameter Name='sort' Value='CustomerID' />


</BaseParams>


<SortInfo Field='CustomerID' Direction='ASC' />


</ext:Store>


</Store>


<ColumnModel ID='ColumnModel1' runat="server">


<Columns>


<ext:Column ColumnID='CustomerID' DataIndex='CustomerID' Header="ID">


</ext:Column>


<ext:Column ColumnID='CompanyName' DataIndex='CompanyName' Header='Company Name'


Width="250">


</ext:Column>


<ext:Column ColumnID='ContactName' DataIndex='ContactName' Header='Contact Name'


Width="150">


</ext:Column>


<ext:Column ColumnID='Address' DataIndex='Address' Header='Address' Width="150">


</ext:Column>


<ext:Column ColumnID='City' DataIndex='City' Header="City">


</ext:Column>


<ext:Column ColumnID='Phone' DataIndex='Phone' Header="Phone">


</ext:Column>


<ext:Column ColumnID='Fax' DataIndex='Fax' Header="Fax">


</ext:Column>


<ext:Column ColumnID='Region' DataIndex='Region' Header="Region">


</ext:Column>


</Columns>


</ColumnModel>


<BottomBar>


<ext:PagingToolbar ID='PagingToolbar1' runat='server' PageSize='15' />


</BottomBar>


</ext:GridPanel>


</div>


</form>


</body>


</html>

Giải thích:
Sự kiện OnRefreshData của Store xử lý mỗi lần data source của store được update (cách xử lý trong code behind).
Thuộc tính RemoteSort="true": Cho phép sắp xếp sử dụng server code.
IDProperty="CustomerID" của JsonReader: thiết lập trường khóa chính dùng trong mục đích insert, delete và update.
ext:Parameter : Các parameters được truyền về mỗi lần store được referesh.
ColumnModel: Định nghĩa các field được bind lên từ CSDL.
ext:PagingToolbar: Control phân trang build-in của Ext.Net.
......

C# code:

using System.Linq;


using Ext.Net;


using NorthwindModel;


public partial class _Default : System.Web.UI.Page


{


protected void Store1_Refresh(object sender, StoreRefreshDataEventArgs e)


{


int start = int.Parse(e.Parameters['start']);


int limit = int.Parse(e.Parameters['limit']);


string dir = e.Parameters['dir'];


string sort = e.Parameters['sort'];


using (NorthwindEntities entities = new NorthwindEntities())


{


var customers = entities.Customers.OrderBy(string.Concat('it.' + sort, ' ', dir));


e.Total = customers.ToList().Count;


dsCustomers.DataSource = customers.Skip(start).Take(limit).ToList();


dsCustomers.DataBind();


}


}


}


Press F5 và xem kết quả:


Note: Việc paging cho GridPanel cũng như các control support paging khác là rất quan trọng trong ứng dụng đòi hỏi sự khéo léo trong vấn đề tối ưu hóa tốc độ thực thi của ứng dụng, Ext.Net take care hầu hết các thiếu sót trong giao diện xây dựng sẳn của .NET, thế vấn đề còn lại của các bạn là feel, thì mới xây dựng được 1 ứng dụng chuyên nghiệp cho cả look and feel.

Hope this help!


ExtGirdDemo.rar (3.67 mb)

"

Chủ Nhật, 16 tháng 1, 2011

install orchard trên localhost

install orchard trên localhost: "

Microsoft vừa cho ra đời 1 CMS mã nguồn mở tên là OrChard, OrChard ra đời giúp ta build 1 CMS content driven webiste, thông tin thêm về OrChard các bạn có thể tìm hiểu ở đây orchard project. Trong bài này mình sẽ hướng dẫn các bạn làm thế nào để install Orchard trên localhost sử dụng csdl SQL.

Chúng ta có 2 cách để install Orchard: install qua WPI và manual install. Mình sẽ chọn cách install manual, đầu tiên cần tải Orchard về từ http://orchard.codeplex.com/releases/view/50197, version Orchard.Source.1.0.20.zip, sau khi tải xong tiến hành giải nén và dùng visual studio 2010 open Orchard.sln trong thư mục Orchard.Source.1.0.20\src.

Press F6 để build Solution, sau đó nhấn F5 để start Orchard.Web.

Màng hình welcome xuất hiện yêu cầu điền thông tin về admin account, kiểu store db.


Mình sẽ chọn Option Use an existing sql server (or sql express) database. (Mình đã tạo db tên là orcharddb và user login trước đó)


Nếu thành công chúng ta sẽ thấy màng hình welcome như:


Login vào Admin Section: http://localhost:30320/OrchardLocal/Admin

Ở phần này chúng ta có thể tạo pages, Blog, Widgets .....

Click vào Create a new Blog để tạo 1 blog mới.


Chú ý: Chúng ta có thể set blog của chúng ta là trang default, bằng cách check vào Set as Home Page.

Nhấn vào Create New Post để tạo 1 bài viết mới cho Blog.

new blog post

Trở về màng hình chính


Ở phần Admin chúng ta còn rất rất nhiều những đặc trưng hấp dẫn: Media, Widget, Pages, Users.... Các bạn từ từ khám phá nhé.

Happy Orcharding!

"

Thứ Ba, 4 tháng 1, 2011

cài đặt blogengine 2.0 sử dụng vs2010 với csdl mysql

cài đặt blogengine 2.0 sử dụng vs2010 với csdl mysql: "

Cách đây vài ngày blogengine team đã cho ra đời phiên bản chính thức blogengine 2.0 sau bao tháng chờ đợi, với version 2.0 này thì blogengine làm việc với môi trường .net 3.5 sử dụng visual studio 2008, thế nhưng blogengine có thể work với môi trường .net 4.0 với visual studio 2010.

Trong bài blog này mình sẽ hướng dẫn chúng ta cách làm cho blogengine work với .net 4.0 sử dụng visual studio 2010, cài đặt sử dụng csdl My sql.

Các bước chuẫn bị:
1. PHP Admin (WampServer).
2. Visual Studio 2010.
3. BlogEngine 2.0 source version.
4. mysql-connector-net-6.3.6

Đầu tiên chúng ta tải BlogEngine 2.0 về từ http://blogengine.codeplex.com/releases/view/58418

Sau khi tải xong, tiến hành giải nén và open BlogEngine.sln trong thư mục BlogEngine.

Chọn project BlogEngine.Core → Properties (Alt + Enter) → Target Framework 4.0 → Yes

upgrade core blogengine project

Tiếp tục add assembly System.Web.ApplicationServices lý do vì 1 số thay đổi đối với role and membership trong .net 4.0, từ BlogEngine.Core chọn Add Reference → System.Web.ApplicationService tiến hành Build (F6) phải đảm bảo là không có 1 message error nào.


add system web application service assembly

Change target framework cho blogengine.net website: từ BlogEngine.Net chọn Properties Page → Build Tab → Target Framework 4.0 → Build website (f6)

change target for BlogEngine .net website

Giờ Press F5 để chạy BlogEngine lên, bởi mặc định BE sẽ sử dụng data store là xml nằm trong App_Data, nến nếu muốn change việc lưu dữ liệu sang dạng khác, mysql chẳng thì chúng ta tìm đến thư mục Setup chọn MySQL.

Trước hết phải tạo 1 db trong mysql

create blogengine mysql db

Sau đó chuyển qua tab Import → Browse tới tập tin MySQLSetup2.0.0.sql trong thư mục setup/MySQL → Go, chắc chắn Import has been successfully finished, 213 queries executed. được trả về.

Config db connection:
Copy toàn bộ nội dung trong file setup/MySQL/MySQL.NET_4.0_Web.Config và paste vào web.config.

Chỉnh connection:


<connectionStrings>
<clear/>
<add name='BlogEngine' connectionString='Server=localhost;Database=blogengine;Uid=root;Pwd=;' providerName='MySql.Data.MySqlClient'/>
</connectionStrings>


Do chúng ta sử dụng Mysql làm data source nên cần 1 thư viện Mysql Connector (mysql-connector-net-6.3.6) version mới nhất tải ở đây, sau khi tải và cài đặt xong mysql connector, chúng ta copy C:\Program Files\MySQL\MySQL Connector Net 6.3.6\Assemblies\v4.0\MySql.Data.dll vào thư mục Bin của website.

Note: do chúng ta dùng version (v6.3.6) mới nhất của Mysql Connector nên trong file web.config cần sửa lại thành:


  <system.data>
<DbProviderFactories>
<clear />
<add name='MySQL Data Provider' invariant='MySql.Data.MySqlClient'
description='.Net Framework Data Provider for MySQL'
type='MySql.Data.MySqlClient.MySqlClientFactory, MySql.Data,
Version=6.3.6.0, Culture=neutral, PublicKeyToken=c5687fc88969c44d' />
</DbProviderFactories>
</system.data>


Press F5 để start BlogEngine chúng ta sẽ thấy màng hình sau:

welcome blogengine 2.0 using my sql db

Nếu thế coi như chúng ta đã setup thành công BlogEngine làm việc với môi trường .net 4.0 sử dụng csdl Mysql

Happy Bloging

"

blogengine.net 2.0 is released

blogengine.net 2.0 is released: "

We're very pleased to announce the release of BlogEngine.NET 2.0. It can be downloaded here.


We accomplished meeting most of our Roadmap goals. The most visible change is the redesign of the control panel. Many thanks to team member Janko Jovanovic for this much more modern control panel UI. There's now a Dashboard, and new pages to View all of your Posts and Pages, which is really nice for easily being able to see your data.


New Databases


On the database side, we are now supporting SQL CE 4. This is a standalone database similar to SQLite and VistaDB. We're no longer providing updates for VistaDB, but you may update your existing VistaDB with the new DB tables & columns which can be found in the upgrade scripts for other databases we continue to provide updates for (SQL Server, MySQL, SQLite).


Features & Upgrading


A complete list of new features in BlogEngine v2.0 can be found here. It's worth noting that this version has made the leap from .NET 2.0 to .NET 3.5. If you are upgrading from a previous version, there's been a lot of changes to files and folders. Please see the upgrade instructions which provide a relatively painless way to upgrade. There are also a small number of breaking changes when upgrading that may affect you. The FAQs and Breaking Changes can be found at the bottom of the Upgrade Instructions page. If you run into any problems upgrading to v2.0, first check the FAQs and Breaking Changes, then search past Discussions to see if your issue has been discussed. If you're still stuck, you are welcome to post a question on the Discussion board.


Upgrading from the BlogEngine.NET 2.0 Release Candidate


If you were testing the BlogEngine.NET 2.0 RC (Release Candidate) and will be upgrading to this final release of BlogEngine.NET 2.0, because there have been changes to a large number of files, including the web.config file, it is best to follow the same set of Upgrade Instructions when upgrading to the final release of BlogEngine.NET 2.0.


Installing from the Web Application Gallery


BlogEngine.NET 2.0 will be available to download from the web application gallery / web platform installer within the next couple of weeks. In the meantime, you may of course download BlogEngine.NET 2.0 directly from CodePlex.

More: http://www.dotnetblogengine.net/post/BlogEngineNET-20-is-Released.aspx

"